The buzz around gut health and gut-healthy food seems to be here to stay, and if that means eating more delicious fermented foods like Sauerkraut we’re all for it! One of the ways we can each support our microbiome – the colony of microbes running the show internally – is to include fermented foods into our diet as these are packed with beneficial live bacteria – more soldiers for our system, as it were.
As well as offering a myriad of health benefits, sauerkraut has a wonderfully pleasing savoury tang which can be a brilliant condiment for so many dishes, brightening and elevating the overall flavour. It’s absolutely fantastic:
● in cheese toasties.
● on the side of buttery jacket potatoes with a dollop of hummus and green salad
● on top of any grain or roasted veggie salad – try using a spoonful of the liquid as a dressing too!
● on top of rich and hearty meat stews and bean chillies for a little crunch and tang
● with burgers and hotdogs in place of a slaw, or tossed through a red cabbage slaw or salad for extra tang!

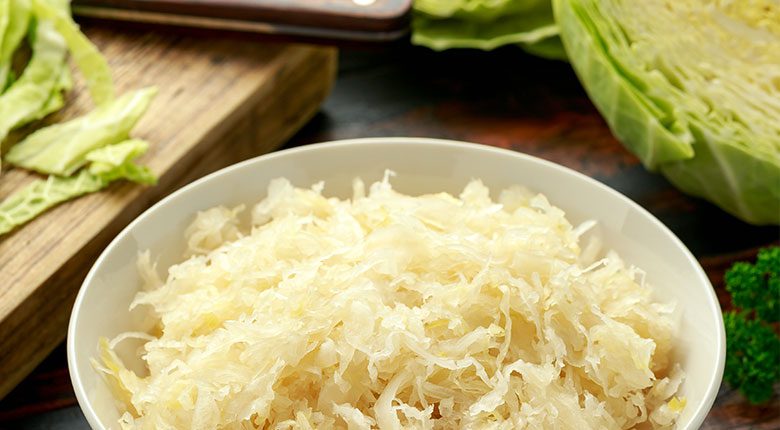
Sauerkraut is incredibly cost-effective to make, the process is great fun, and it’s really rewarding. We still get excited that a simple combination of cabbage, salt and time can create such complex, delicious flavours. Here’s what you need to know.
What do you need to make sauerkraut?
- 1 large white cabbage
- 20 g flakey sea salt
- 1 very large mixing bowl
- 1-litre flip-top Kilner jar
- Weighing scales
How to make sauerkraut:
- Wash your hands, cabbage, chopping board and knife well – it’s important that no harmful bacteria get involved at the beginning. Next, sterilise your jar by giving it a good wash and rinse, then standing it in a preheated oven (140 degrees), for 10 minutes. Remove the rubber seal before placing the jar in the oven. Pour boiling water over the rubber seal to sterilise.
- Cut off the base of the cabbage and keep this to one side, it will be helpful later. Discard the 2 external leaves, then quarter the cabbage, cut away the hard central core (hold onto these offcuts too) and finely shred.
- Weigh your shredded cabbage into your largest mixing bowl. You’ll only need 1 kg of shredded cabbage here, so if you have any excess, remove this from your bowl and save for an alternative recipe.
- Sauerkraut uses a ratio of 2% salt : for 1kg of shredded cabbage 20g of sea salt is needed. Sprinkle the salt over the cabbage and begin to scrunch! Slow, strong and steady works best here. As the cabbage bruises it will soften and release approximately 1 cup of water. This will take about 10 minutes.
- Once the cabbage is soft and there’s lots of free liquid in the bowl, pack your sterilised jar and compress down each handful as you go. Removing all the air pockets creates an anaerobic environment where the healthy (lactic acid) bacteria can thrive.
- Pour over the excess cabbage juice from the mixing bowl to fill your jar. Wipe away any exposed bits of cabbage which poke above the water line and make sure the neck of your jar looks clean.
- Trim around the cabbage base you popped to one side earlier until it fits neatly in the neck of the jar. This will act as a ‘bung’. If you need a little extra height to fully compress the cabbage use an offcut of the central core. The shredded cabbage should be encouraged to remain below the water line as the lid is closed.
- And now to ferment! Stand your kilner jar in a bowl and leave it at room temperature for 3-4 weeks. Keep it away from central heating and out of direct sunlight, and, most crucially, ‘burp’ your jar each day to allow the carbon dioxide to escape. CO2 is a natural byproduct of fermentation but if too much pressure builds up inside the jar it can become dangerous.
- After 3 weeks – or slightly longer if you love a seriously tangy kraut! – your cabbage should be pleasantly acidic, and bursting with gut-healthy bacteria. Once fermented it will last in the fridge for up to 6 months, just remember to use a clean spoon each time.